« Back to Knowledge Base


Arduino Tally Lights Setup Guide
The following steps below will configure your Arduino board for use with the vMix Tally Lights feature.
We recommend the official Arduino Uno board.
1. Download and install the latest Arduino software from the following web site:
As of publishing this article, the latest version is 1.8.8
2. Connect your Arduino board via USB.
3. Right click the Start Menu and go to Device Manager.
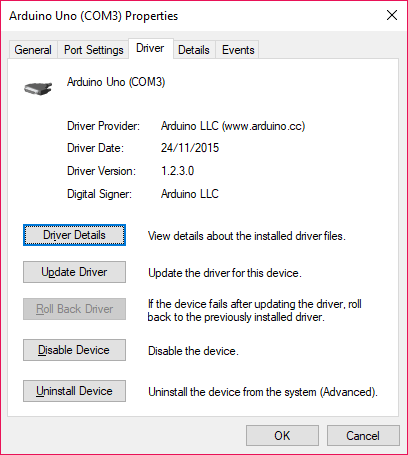
Under the Ports (COM) section, right click the Arduino board and select properties.

The Driver Version should be at least 1.2.3.0 and dated from November 2015.
If not, refer to the Arduino documentation for installing the latest drivers.
Do not proceed until this driver is up to date.
4. Start the Arduino software.
Go to File -> Examples -> Firmata -> StandardFirmata to open the StandardFirmata firmware.
Do not select StandardFirmataPlus or any other option as they will not work with vMix.
5. Go to Tools -> Port and select the COM port of your board.
6. Go to Tools -> Board and select the board type.
7. Go to Tools -> Get Board Info
If configured correctly, this will display your board information, if it shows an error check steps 5 and 6 and try again.
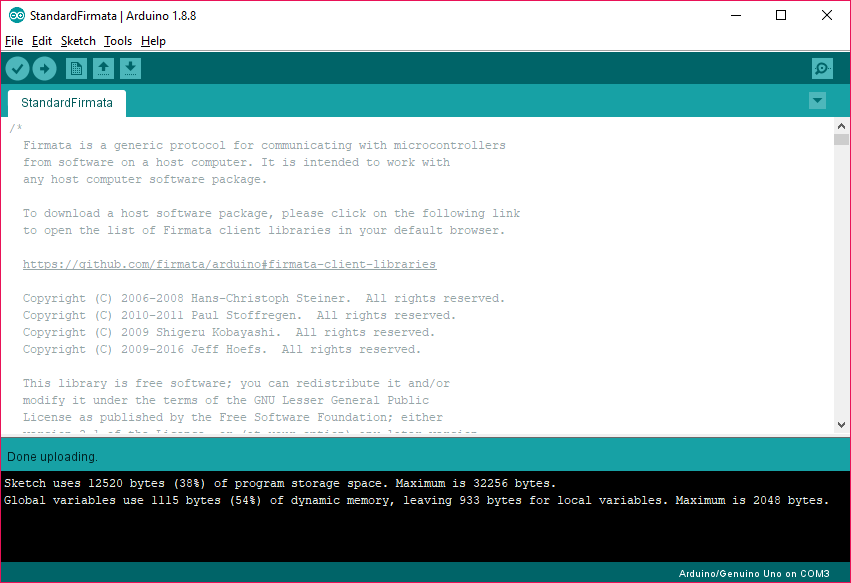
8. Go to Sketch -> Upload
If successful the screen should look like the following:

9. Close down the Arduino software and start vMix.
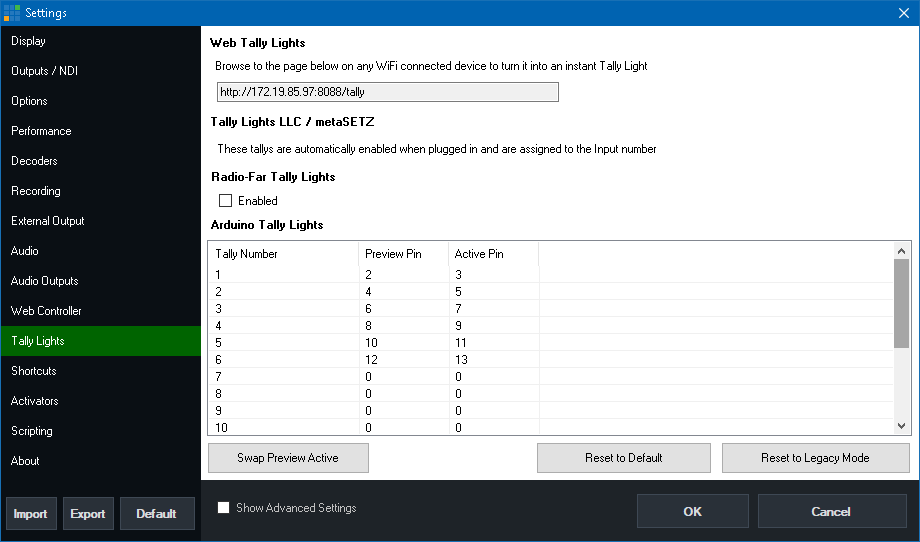
Go to Settings -> Tally Lights. This will display the pin mappings for Preview and Active (Program) to connect your LED tally lights to on the board.

10. Add the inputs you wish to use to vMix.
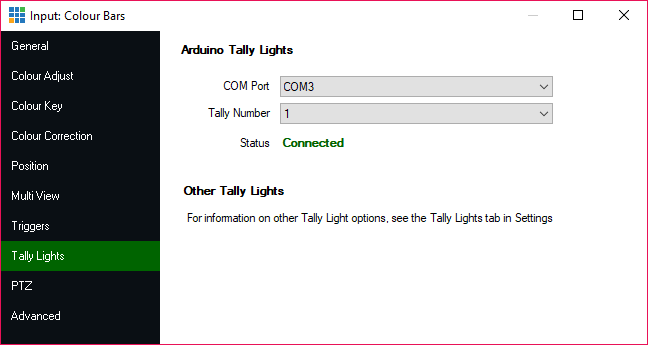
For the inputs that need tally lights setup, click the cog icon underneath them and go to the Tally Lights tab in Input Settings.
11. Select the COM port to connect to the board and then select the Tally Number.
Note: The Tally Number is not the board pin, refer to step 9 above for the correct tally number to pin mappings.
If successful, the screen should look like the following.
Switching between cameras should now activate the relevant LED light.
Switching between cameras should now activate the relevant LED light.

12. If there is an error connecting, or the lights do not work as expected, refer to the Arduino documentation
on wiring up the LED lights correctly. In some cases a faulty USB cable may also cause connection issues.
on wiring up the LED lights correctly. In some cases a faulty USB cable may also cause connection issues.
Last Updated: Wednesday, September 9, 2020 10:17:52 AM
