Mapping a Data Source to a Title
Once one more Data Sources have been added, they can be easily assigned to any Title input from within vMix.
(See Setting up a new Data Source for help on setting up a new Data Source)
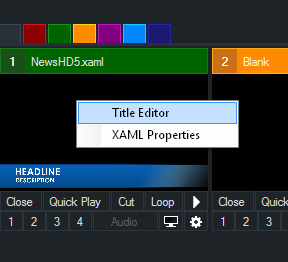
1. Right click a Title input from within vMix and click Title Editor from the menu.

2. Select one of the Title fields from the left hand column (such as Headline, Description etc) then click Data Source from the top menu bar.

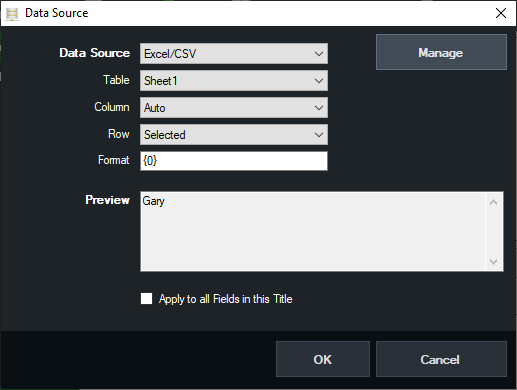
3. Select the Data Source and other settings such as Table and Column.
Table: Select the table you wish to source the data from. Some data sources may only have a default table available to select here.
Column: Select the column to use for this particular Title Field, if you leave this set to Auto, the data source will map based on the following:
a) Will first look for the first column with the exact same name as the Title field, for example "Headline". Include the full name including any suffix like ".Text".
b) If no column is found, use the column index that matches the Title field index. For example Headline would be Column1, Description Column2 and so on.
Row: Select the row to use for this particular Title Field. If you leave this set to Selected, the data source will map based on the currently selected row in the Data Sources Manager.
Format: This option can be used to add additional text to the data, for example "Name: {0}" will output the data as "Name: Gary"
A preview will be displayed showing the data that will be assigned to the title.

4. Click OK and the data will automatically populate the text box in the Title Editor

5. Repeat steps 1 to 4 for each Title field you wish to assign to data.